Crispy Chinese Lemon Chicken: Better Than Takeout
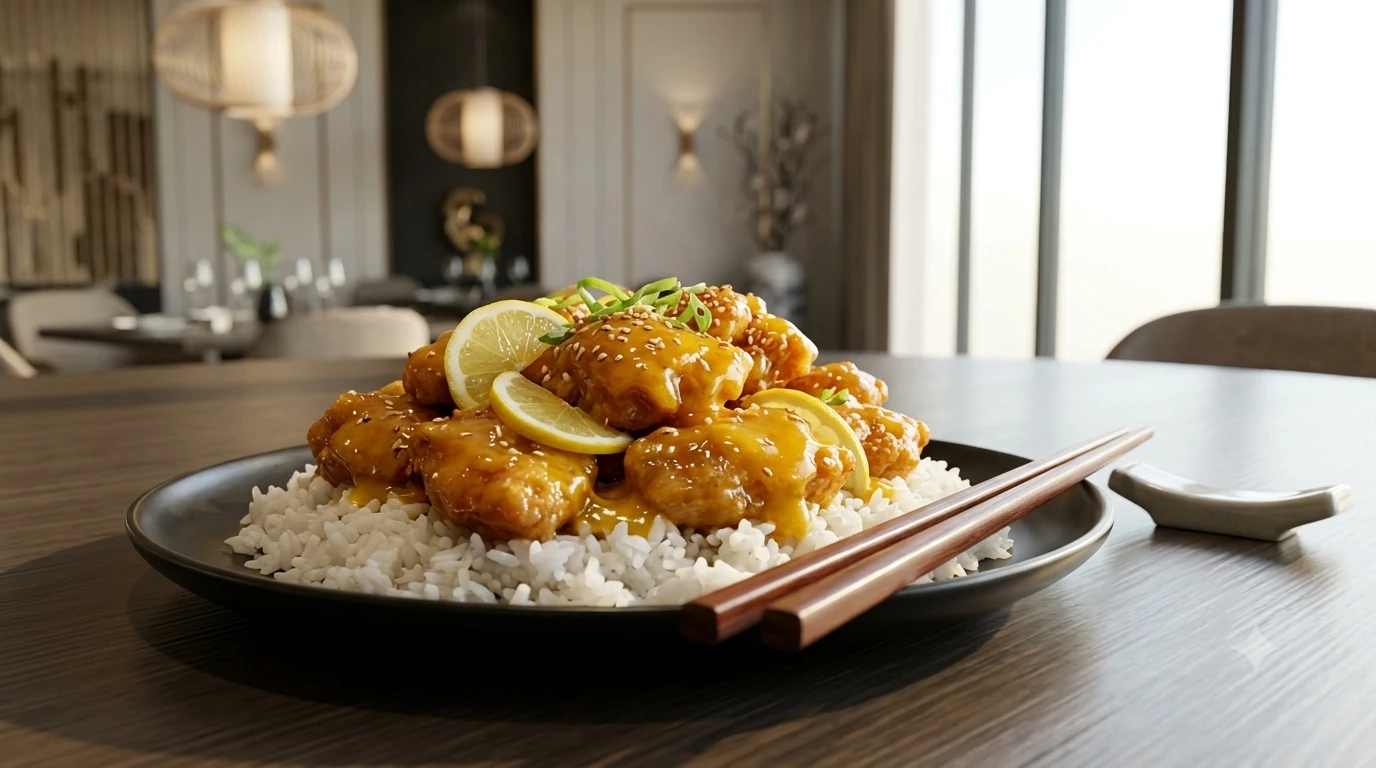
The best Crispy Chinese Lemon Chicken does something most fried chicken can’t: it stays audibly crisp even after a bright, sticky sauce gets poured over it. Cut into a piece and you should hear it before you taste it, a light crackle giving way to juicy, well-seasoned chicken underneath, all of it wrapped in a lemon sauce that’s sweet first, tangy right behind it, and glossy enough to catch the light. That’s Crispy Chinese Lemon Chicken done right, and it’s a very different dish from the sauce-drowned, batter-heavy version that shows up in a lot of takeout containers.
This dish earned its place as a Chinese-American restaurant staple because it delivers two things people want from fried chicken at the same time: real crunch and real brightness. Get the frying technique right and the coating shatters instead of chews. Get the sauce right and it clings to the chicken in a thin, glossy layer instead of soaking in and turning everything soft. Most home versions fail at one or both.
By the end of this guide, you’ll understand what separates Crispy Chinese Lemon Chicken from basic American lemon chicken, why double frying matters more than any seasoning choice, how to build a sauce that stays glossy instead of gummy, and exactly where most home cooks go wrong. You’ll also get a full recipe card, ingredient breakdowns, storage instructions, and answers to the questions people ask most when they’re trying to recreate this dish at home.
Table of Contents
What Is Crispy Chinese Lemon Chicken?
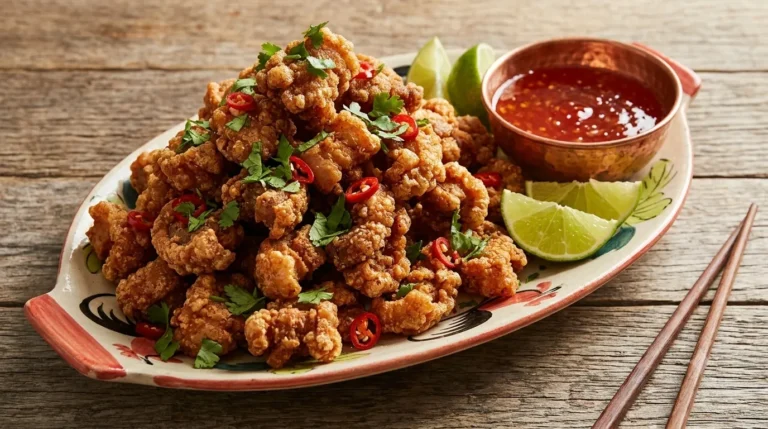
Crispy Chinese Lemon Chicken is deep-fried, cornstarch-coated chicken, cut into pieces or served as a whole cutlet, finished with a sweet and tangy lemon sauce that’s thickened just enough to cling rather than pool. The chicken is fried until the coating turns light gold and genuinely crisp, then either topped with sauce or lightly tossed in it right before serving.
It’s a different animal from American-style lemon chicken, which often means a pan-seared or lightly breaded cutlet with a thin, buttery lemon sauce closer to a French-inspired preparation. Crispy Chinese Lemon Chicken leans harder into contrast: a thicker, crunchier coating against a sauce built on sugar, lemon juice, and a touch of chicken stock rather than butter and wine.
This is one of the most ordered dishes on Chinese-American takeout menus because it satisfies two cravings that don’t usually show up together, deep-fried crunch and citrus brightness, without leaning too heavily on chili heat or heavy soy-based richness. That makes it approachable for people who might find other Chinese takeout dishes too spicy or too salty.
The dish remains a family favorite for a simple reason: kids like it because it’s sweet and crispy, adults like it because the sauce doesn’t overpower the chicken itself, and it reheats reasonably well compared to a lot of other fried dishes. Few takeout orders get requested by name as often as lemon chicken does.
The History of Lemon Chicken
Lemon chicken traces its roots to Cantonese cooking traditions, where quick-frying meat and finishing it with a light, fruit-based sauce was already common practice well before the dish crossed into Western restaurants. Cantonese cuisine has long favored sauces built around balance rather than intensity, sweet against sour, with minimal heat, and lemon chicken fits that pattern closely.
Hong Kong restaurants refined the dish through the twentieth century as Western ingredients like lemons became more widely available and diners began favoring lighter, citrus-forward sauces alongside the richer, soy-based dishes that dominated older menus. The frying technique, thin cornstarch coating, hot oil, quick cook time, stayed consistent with broader Cantonese deep-frying methods used across many other dishes.
As Chinese immigrants opened restaurants across the United States through the mid-twentieth century, lemon chicken became one of the dishes adapted most heavily for American tastes. The sauce grew sweeter, the coating grew thicker and crunchier, and portions grew larger, shifting the dish from a Cantonese banquet item toward a takeout menu centerpiece.
The difference between authentic Cantonese versions and American-Chinese adaptations comes down mostly to sugar and scale. Traditional Cantonese lemon chicken tends toward a lighter, more delicately balanced sauce with less sugar, while the American-Chinese version most people know leans sweeter and pairs with a noticeably thicker fried coating. Neither version is more correct than the other; they’re built for different expectations.
Why This Dish Is So Special
A well-made batch of Crispy Chinese Lemon Chicken pulls off several things at once, and each one matters on its own.
- Ultra-crispy coating. The chicken should crackle under a fork, not just look golden.
- Tender, juicy chicken. Underneath the crunch, the meat stays moist, never dry or stringy.
- Bright lemon flavor. Real lemon juice and zest, not just sugar with a citrus name attached.
- Sweet and tangy sauce. Sweetness leads, but the tang from lemon and a touch of vinegar keeps it from tasting like candy.
- Restaurant-quality texture. A glossy sauce that clings rather than drowns the coating.
- Quick cooking time. Once the chicken is prepped, the entire dish comes together in well under 30 minutes of active cooking.
None of these elements is complicated on its own. What makes the dish special is that most home versions only nail two or three of them, usually landing a decent sauce over a soggy or overly thick coating.
The Science Behind Crispy Fried Chicken
Understanding what’s happening in the pan changes how carefully you handle each step, not just which steps you follow.
Cornstarch vs. flour comes down to gluten. Wheat flour develops gluten when it’s mixed and hits hot oil, producing a denser, more bread-like crust. Cornstarch has no gluten, so it fries into something thinner and more brittle, closer to glass than bread. That’s the texture Crispy Chinese Lemon Chicken is built around.
Protein coagulation is the process by which chicken proteins firm up and set as they cook. This happens gradually as internal temperature rises, and it’s the reason overcooked chicken turns tough and dry: the proteins have squeezed out too much moisture by the time they’ve fully set. Cooking to just done, not further, keeps the texture tender.
Double frying works by separating cooking from crisping. The first fry, at a slightly lower temperature, cooks the chicken through. A short rest afterward lets trapped steam inside the coating escape. The second fry, at a higher temperature and for a shorter time, crisps the exterior further without pushing the chicken past done. Skipping this step is the single biggest reason home-fried chicken goes soft within minutes.
Oil temperature in the 350–375°F range allows the coating to set and brown before the chicken inside overcooks. Oil that’s too cool gets absorbed into the coating instead of crisping it, which is the most common cause of greasy fried chicken. Oil that’s too hot browns the outside before the inside finishes cooking.
Moisture evaporation during frying is what actually creates crunch. As the coating fries, water inside it turns to steam and escapes, leaving behind a dry, brittle structure. Anything that traps that moisture back in, like stacking fried chicken on paper towels, undoes the work the fryer just did.
Why starch creates a crispier coating ties back to the same gluten-free structure that makes cornstarch preferable to flour. A thin starch coating dries out fast and evenly in hot oil, producing a shatter-crisp texture rather than a thicker, chewier crust.
Why sauce should be added just before serving is simple: lemon sauce is liquid, and liquid softens a crisp coating on contact. The longer sauced chicken sits, the softer it gets. Restaurants time the sauce to hit the chicken only seconds before it reaches the table.
Choosing the Best Chicken
| Cut | Flavor | Juiciness | Texture | Cooking Time | Best For |
|---|---|---|---|---|---|
| Chicken Breast | Mild | Moderate, dries out if overcooked | Firm | Fast | Classic restaurant-style, needs careful timing |
| Chicken Thighs (bone-in) | Rich | High | Tender | Moderate | Deep flavor, more prep work |
| Boneless Skinless Thighs | Rich | High | Tender | Fast | Best balance of flavor and ease |
| Chicken Tenderloins | Mild | Moderate | Very tender | Very fast | Fastest option, smaller pieces |
Boneless skinless thighs are the best option for beginners. They hold moisture better than breast meat even if you slightly overcook them, and they cut into even pieces quickly. Chicken breast is the more traditional restaurant choice for this dish, especially when it’s served as a whole cutlet, but it punishes overcooking more severely. Tenderloins fry fastest of all, which makes them a good choice if you’re short on time, though they yield smaller pieces than a classic restaurant-style presentation.
Ingredients Explained
| Ingredient | Why It Matters |
|---|---|
| Chicken | The base of the dish; thighs hold moisture better than breast |
| Cornstarch | Creates the thin, glassy, shatter-crisp coating |
| Flour | A small amount adds structure without making the coating heavy |
| Eggs | Help the coating adhere evenly to the chicken |
| Baking powder (optional) | Lightens the coating and encourages extra crispness |
| Salt | Seasons the chicken from the inside out |
| White pepper | Adds a sharp, floral heat without overpowering the dish |
| Garlic | Builds savory depth in the marinade |
| Fresh ginger | Adds brightness and cuts through the richness of the fried coating |
| Lemon juice | The core flavor of the sauce; fresh juice makes a real difference here |
| Lemon zest | Carries the aromatic oils that bottled juice alone can’t replicate |
| Sugar | Balances the acidity of the lemon juice |
| Honey | Adds a rounder sweetness and a touch of extra gloss to the sauce |
| Chicken stock | Gives the sauce body and savory depth beyond straight citrus and sugar |
| Soy sauce | A small amount adds umami without turning the sauce brown or salty |
| Rice vinegar | Adds a second layer of tang that supports the lemon rather than competing with it |
| Sesame oil | A finishing touch for aroma, added off heat |
| Cornstarch slurry | Thickens the sauce to a glossy, cling-worthy consistency |
| Green onions | Fresh, sharp garnish that cuts the richness of the fried coating |
| Sesame seeds | Adds a light crunch and visual finish |
Every ingredient here is doing a specific job. Skip the fresh zest and the sauce loses its aromatic top note, even if the juice is fresh. Skip the baking powder and the coating stays a touch denser than a restaurant version. Small choices like these are what separate a good homemade version from a forgettable one.
The Secret to Restaurant-Style Lemon Sauce
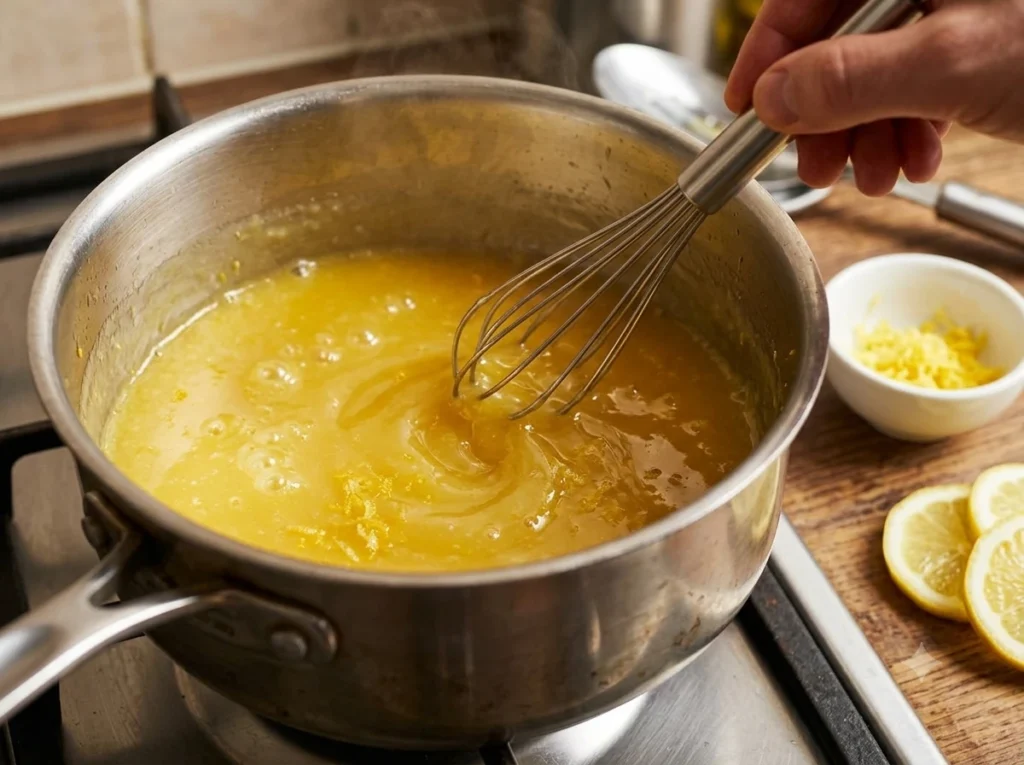
Balancing sweet and sour is the whole game here. The sauce should taste sweet first, with the lemon’s tang arriving right behind it, not fighting for the lead. Too much sugar and it tastes like candy glaze; too much acid and it turns sharp and one-note.
Fresh lemon vs. bottled juice makes a real difference in this dish specifically, because the sauce doesn’t have many other ingredients to hide behind. Fresh juice carries a rounder, more complex acidity than bottled juice, which often tastes flatter and slightly metallic once it’s cooked down.
Using zest for aroma matters because the fragrant oils in lemon zest are different from what’s in the juice. Juice provides sourness; zest provides the actual “lemon smell” that makes the sauce taste fresher and more vibrant. Skipping zest is one of the most common reasons homemade lemon sauce tastes duller than a restaurant version.
Thickening with cornstarch should happen gradually. Whisk a small amount of cornstarch slurry into the simmering sauce, then wait a few seconds before adding more; cornstarch thickens fast, and it’s much easier to add more than to thin out an overly thick sauce.
Achieving a glossy finish comes from two things: proper thickening and a splash of fat, either sesame oil or a small pat of butter, stirred in off heat at the very end. That final addition is what gives the sauce its restaurant-style sheen.
How to prevent the sauce from becoming gummy comes down to not over-thickening. Add cornstarch slurry in small increments and stop as soon as the sauce coats the back of a spoon. A sauce that’s gluey rather than glossy has almost always had too much starch added at once.
Step-by-Step Technique
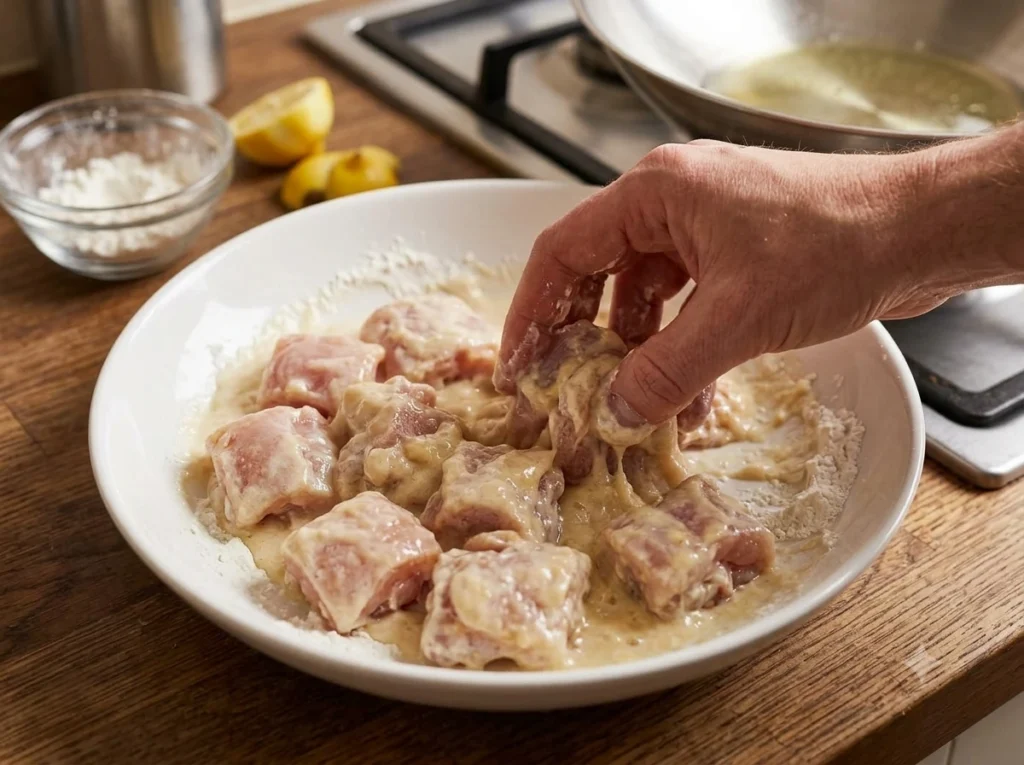
1. Prepare the chicken. Cut chicken thighs or breast into evenly sized pieces, roughly 1 to 1.5 inches. Pat completely dry with paper towels.
2. Marinate. Toss chicken with a small amount of salt, white pepper, minced garlic, and grated ginger. Let it sit for 15 to 20 minutes at room temperature, or up to a few hours refrigerated.
3. Make the coating. Whisk cornstarch, a small amount of flour, and baking powder together in one bowl. Beat eggs in a second bowl. Dip chicken in egg, then dredge through the cornstarch mixture, pressing lightly so it adheres.
4. Heat the oil. Bring oil to 350–375°F in a Dutch oven or wok. Use a thermometer; this is the step most home cooks skip and most regret skipping.
5. First fry. Fry chicken in small batches for 3 to 4 minutes, until cooked through and pale golden. Avoid crowding the pot, which drops the oil temperature and leads to a greasy coating.
6. Rest. Transfer chicken to a wire rack for 5 to 10 minutes. This lets trapped steam escape before the second fry.
7. Second fry. Return oil to 375°F and fry again for 1 to 2 minutes, until deep golden and audibly crisp.
8. Make the sauce. While the chicken rests, combine lemon juice, zest, sugar, honey, chicken stock, soy sauce, and rice vinegar in a saucepan. Simmer for a few minutes, then thicken gradually with cornstarch slurry until glossy.
9. Coat the chicken. Toss the fried chicken in the sauce just before serving, or plate the chicken and spoon sauce over the top if you want to preserve maximum crunch.
10. Serve immediately. Garnish with green onions and sesame seeds and get it to the table while the coating is still at its crispest.
Equipment Needed
- Dutch oven or wok, for frying
- Spider strainer, for lifting chicken cleanly from the oil
- Instant-read thermometer, essential for oil temperature
- Mixing bowls, for marinade, egg wash, and coating
- Whisk, for a smooth, lump-free sauce
- Wire rack, for resting fried chicken between fries
- Microplane, for zesting lemons without the bitter white pith
Common Mistakes
Mistake #1: Skipping the double fry. Why it happens: it feels like an unnecessary extra step. How to avoid it: treat the second fry as mandatory if you want the coating to survive contact with sauce. How to fix it: if chicken has already gone soft after one fry, a quick second fry at high heat can still recover most of the crunch.
Mistake #2: Adding sauce too early. Why it happens: wanting the dish to look finished right away. How to avoid it: sauce the chicken only right before serving. How to fix it: serve remaining sauce on the side if the dish has to sit for a few minutes before eating.
Mistake #3: Using bottled lemon juice. Why it happens: convenience, and it’s already in the fridge. How to avoid it: use fresh lemons for both juice and zest. How to fix it: if bottled juice is all you have, add extra zest to help bring back some of the missing aroma.
Mistake #4: Frying at too low a temperature. Why it happens: home stovetops run cooler than commercial fryers, and it’s easy to misjudge without a thermometer. How to avoid it: check oil temperature before every batch, not just the first. How to fix it: pull the chicken, let the oil recover to 350–375°F, and continue.
Mistake #5: Overcrowding the pot. Why it happens: trying to save time by frying everything at once. How to avoid it: fry in small batches with space between pieces. How to fix it: remove excess chicken and let the oil temperature climb back up before continuing.
Mistake #6: Not drying the chicken before coating. Why it happens: skipping the pat-dry step. How to avoid it: always pat chicken dry before marinating and again before dredging. How to fix it: shake off any excess moisture from the marinade before the egg wash step.
Mistake #7: Using only flour instead of cornstarch. Why it happens: flour is the default pantry item. How to avoid it: keep cornstarch on hand specifically for Chinese-style frying. How to fix it: blend in whatever cornstarch you have to lighten a too-heavy flour coating.
Mistake #8: Resting fried chicken on paper towels instead of a rack. Why it happens: habit. How to avoid it: use a wire rack over a baking sheet so steam escapes downward. How to fix it: transfer chicken to a rack the moment you notice the bottom softening.
Mistake #9: Over-thickening the sauce. Why it happens: adding all the cornstarch slurry at once out of impatience. How to avoid it: add slurry gradually and stop once the sauce coats a spoon. How to fix it: thin an overly thick sauce with a splash of chicken stock or water.
Mistake #10: Using chicken breast without adjusting fry time. Why it happens: breast looks leaner and cooks faster, but that’s exactly the risk. How to avoid it: pull breast pieces from the oil slightly earlier than thigh meat. How to fix it: cut oversized breast pieces smaller next time for more even cooking.
Mistake #11: Skipping the baking powder. Why it happens: it seems optional. How to avoid it: include a small amount in the coating for extra lightness and crunch. How to fix it: no real fix after frying, but note it for next time.
Mistake #12: Not checking oil temperature between batches. Why it happens: assuming the oil holds steady on its own. How to avoid it: check the thermometer before every new batch. How to fix it: pause frying until the oil recovers to temperature.
Mistake #13: Using old or reused frying oil. Why it happens: trying to stretch oil from a previous use. How to avoid it: use fresh oil for the cleanest flavor and crispest results. How to fix it: replace oil that smells off or looks dark before continuing.
Mistake #14: Skipping the marinade. Why it happens: rushing straight to coating and frying. How to avoid it: give the chicken at least 15 to 20 minutes with salt, garlic, and ginger before coating. How to fix it: season the coating itself a little more heavily to compensate.
Mistake #15: Serving the dish too long after frying. Why it happens: prepping everything ahead for guests. How to avoid it: time the second fry and the sauce to finish within minutes of each other. How to fix it: a quick pass through a hot oven can help revive crispness if serving gets delayed.
Pro Chef Tips
- Pat chicken completely dry before both marinating and coating.
- Use a thermometer for oil temperature on every batch, not just the first.
- Cut chicken into uniform pieces for even cooking.
- Use mostly cornstarch with just a touch of flour in the coating.
- Add baking powder for a lighter, crisper texture.
- Marinate at least 15 minutes for real flavor in the meat itself, not just the sauce.
- Never skip the rest between the first and second fry.
- Fry in small batches, without exception.
- Use fresh oil, and don’t reuse it more than once for this dish.
- Zest your lemons before juicing them, not after.
- Add cornstarch slurry to the sauce gradually, in small additions.
- Finish the sauce with sesame oil off heat for extra shine.
- Toss chicken in sauce only right before serving.
- Use a spider strainer, not tongs alone, for cleaner oil drainage.
- Rest fried chicken on a wire rack, never stacked paper towels.
- Taste the sauce before it fully thickens, since it’s easier to adjust while thin.
- Keep white pepper on hand specifically for Chinese-style marinades.
- Grate ginger with a microplane for a smoother marinade texture.
- Serve immediately, within about 10 minutes of the final toss in sauce.
- Double the sauce recipe if serving a crowd; it’s easy to run short.
- Warm serving plates slightly so the dish doesn’t cool and soften too fast.
- If reheating leftovers, always use an oven or air fryer, never a microwave.
Delicious Variations
Spicy Lemon Chicken: Add a small amount of chili garlic sauce or fresh minced chili to the sauce for heat that plays against the citrus.
Orange-Lemon Chicken: Replace half the lemon juice and zest with orange juice and zest for a rounder, slightly sweeter citrus profile.
Air Fryer Version: Coat the chicken as directed, spray lightly with oil, and air fry at 375°F for about 12 to 14 minutes, shaking the basket halfway through.
Oven-Baked Version: Arrange coated chicken on a wire rack over a baking sheet and bake at 425°F for 20 to 25 minutes, flipping once for even color.
Gluten-Free Version: Use cornstarch alone, skipping the small amount of flour, and confirm your soy sauce is labeled gluten-free.
Low-Sugar Version: Reduce the sugar and honey by roughly half and add a touch more chicken stock to maintain the sauce’s body.
Chicken Thigh Version: Use boneless skinless thighs throughout for a juicier, more forgiving result than breast meat, especially useful for beginners.
Storage & Reheating
Refrigeration: Store fried chicken and sauce in separate airtight containers for up to 3 days. Keeping them apart preserves crunch far longer than storing them combined.
Freezing: Freeze fried chicken in a single layer before transferring to a freezer bag; this keeps pieces from clumping. It keeps well for up to 2 months. Freeze sauce separately in a small container.
Best reheating methods: Reheat chicken in an oven or air fryer at 375–400°F for 8 to 10 minutes to restore crispness, then warm the sauce separately and combine just before serving.
How to restore crispiness: A dry reheat, oven or air fryer, is essential. A microwave heats the chicken through but leaves the coating limp, since it can’t drive off surface moisture the way dry heat does.
Food safety: Reheat chicken to an internal temperature of 165°F. Don’t let fried chicken sit at room temperature for more than two hours.
What to Serve with Crispy Chinese Lemon Chicken
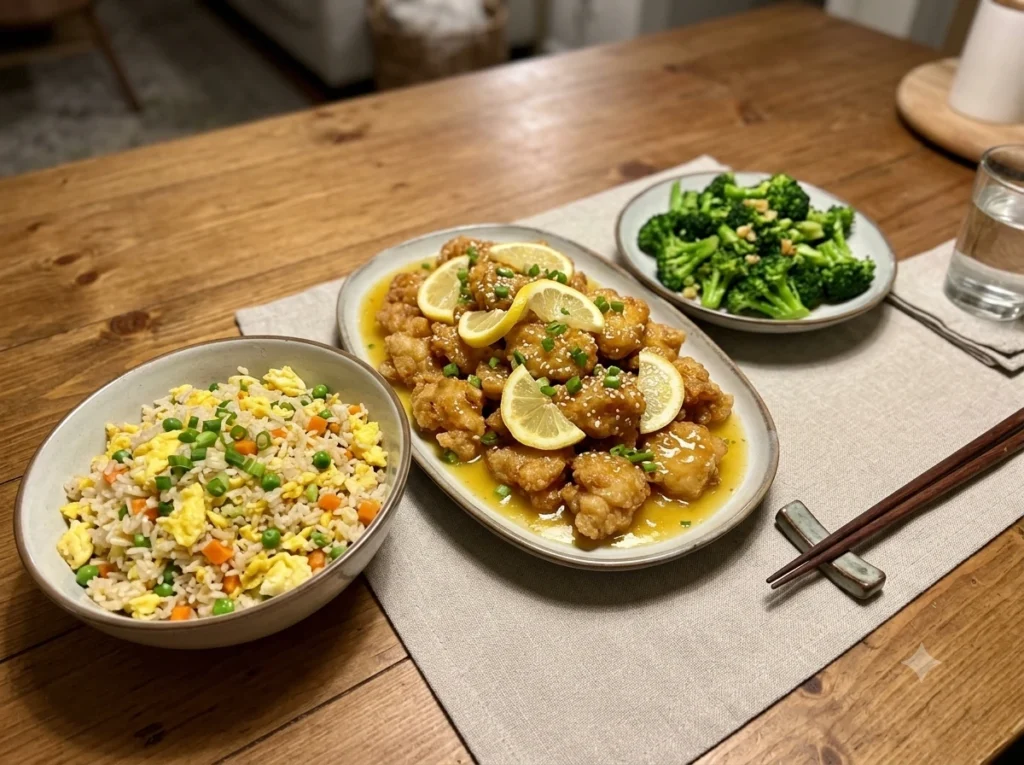
- Steamed jasmine rice: A neutral base that lets the sauce and crispy coating stand out.
- Egg fried rice: A heartier option if you want the whole meal built around one pan.
- Vegetable fried rice: A lighter, vegetable-forward alternative to egg fried rice.
- Chow mein: Adds a different noodle-based texture alongside the crispy chicken.
- Stir-fried broccoli: A classic pairing that adds color and a slightly bitter contrast to the sweet sauce.
- Bok choy: Light, slightly mineral greens that balance the richness of the fried coating.
- Sugar snap peas: Adds crunch and a touch of sweetness that echoes the lemon sauce.
- Vegetable spring rolls: A crunchy starter that sets the tone before the main dish arrives.
- Hot and sour soup: A tangy, warming starter that contrasts nicely with the sweeter main course.
- Chinese cucumber salad: A cool, vinegar-forward side that cuts through the richness of the fried chicken.
Drink pairings: Jasmine tea and green tea both work as traditional, palate-cleansing options. Sparkling lemonade echoes the dish’s citrus notes for a non-alcoholic pairing. For wine, a Riesling or Sauvignon Blanc, both high in acidity, stand up well to the sweetness of the sauce without getting lost.
Frequently Asked Questions
Can I use chicken thighs instead of chicken breast? Yes. Boneless skinless thighs hold moisture better than breast and are more forgiving if slightly overcooked, making them a great option for a first attempt at Crispy Chinese Lemon Chicken.
Can I bake instead of fry? Yes. Bake coated chicken on a wire rack at 425°F for 20 to 25 minutes, flipping once. The texture will be lighter than deep-fried, but still satisfying.
Can I air fry Crispy Chinese Lemon Chicken? Yes. Coat as directed, spray lightly with oil, and air fry at 375°F for about 12 to 14 minutes, shaking the basket halfway through cooking.
Why isn’t my chicken crispy? Usually one of three culprits: oil that wasn’t hot enough, skipping the second fry, or sauce added too far ahead of serving. Check all three before troubleshooting further.
Can I make the lemon sauce ahead? Yes, the sauce can be made up to 2 days ahead and refrigerated. Reheat gently on the stove and thin with a splash of stock if it’s thickened too much in storage.
Can I freeze leftovers? Yes, freeze the chicken and sauce separately for the best texture on reheating. Combine them only after both have been reheated.
Can I use bottled lemon juice? You can, but fresh lemon juice and zest produce a noticeably brighter, more aromatic sauce. Bottled juice tends to taste flatter once cooked down.
Why did my coating fall off during frying? This usually means the chicken wasn’t dry enough before dredging, or the egg wash step was skipped or applied unevenly. Pat chicken dry and make sure every piece is fully coated in egg before the cornstarch mixture.
What’s the best oil for frying Crispy Chinese Lemon Chicken? A neutral, high-smoke-point oil like vegetable, canola, or peanut oil. Avoid strongly flavored oils that can overpower the dish or smoke at frying temperatures.
How do restaurants keep the chicken crispy under all that sauce? Mostly through timing: the sauce is added seconds before the dish reaches the table, not while the chicken sits and cools. The double-fry method also produces a sturdier coating that resists softening longer than a single fry.
Can I make this dish gluten-free? Yes, use cornstarch alone instead of a cornstarch-flour blend, and confirm your soy sauce is labeled gluten-free.
Why does my sauce taste flat? This usually points to bottled lemon juice, missing zest, or a sauce that needs a touch more salt or soy sauce to round out the flavor. Taste and adjust before thickening.
Can I double this recipe for a crowd? Yes, but keep frying in the same small batches regardless of total quantity, since overcrowding the pot is what causes greasy results.
Is Crispy Chinese Lemon Chicken very spicy? No, the traditional version has no significant heat. It’s built around sweet and tangy flavors, though chili can be added for a spicy variation.
How long does the coating stay crispy after saucing? Expect the crispiest texture in the first 10 minutes after saucing. After that, the sauce gradually softens the coating, which is why timing matters so much.
Recipe Card
Crispy Chinese Lemon Chicken
| Prep Time | 20 minutes |
| Cook Time | 20 minutes |
| Total Time | 40 minutes |
| Servings | 4 |
| Cuisine | Chinese, Cantonese-American |
| Course | Main Dish |
| Calories (estimated) | Approximately 410 per serving |
Ingredients
- 1.5 lbs boneless skinless chicken thighs (or breast), cut into 1–1.5 inch pieces
- 1/2 teaspoon salt
- 1/2 teaspoon white pepper
- 2 garlic cloves, minced
- 1 teaspoon grated fresh ginger
- 2 eggs, beaten
- 3/4 cup cornstarch
- 2 tablespoons flour
- 1/2 teaspoon baking powder
- Neutral oil, for frying
- 1/3 cup fresh lemon juice
- Zest of 1 lemon
- 1/4 cup sugar
- 2 tablespoons honey
- 1/2 cup chicken stock
- 1 teaspoon soy sauce
- 1 teaspoon rice vinegar
- 1 teaspoon sesame oil
- 1 tablespoon cornstarch mixed with 2 tablespoons water (slurry)
- Green onions and sesame seeds, for garnish
Instructions
- Pat chicken dry and toss with salt, white pepper, garlic, and ginger. Marinate 15 to 20 minutes.
- Whisk cornstarch, flour, and baking powder in one bowl. Beat eggs in a second bowl. Dip chicken in egg, then dredge through the cornstarch mixture.
- Heat oil to 350–375°F in a Dutch oven or wok.
- Fry chicken in small batches for 3 to 4 minutes, until cooked through and pale gold.
- Rest on a wire rack for 5 to 10 minutes.
- Return oil to 375°F and fry a second time for 1 to 2 minutes, until deep golden and crisp.
- While chicken rests, simmer lemon juice, zest, sugar, honey, stock, soy sauce, and rice vinegar. Thicken gradually with cornstarch slurry, then stir in sesame oil off heat.
- Toss fried chicken in the sauce just before serving, or plate and spoon sauce over the top.
- Garnish with green onions and sesame seeds and serve immediately.
Chef Notes: The second fry and the timing of the sauce are the two details that matter most. Get those right and the rest of the dish falls into place.
Storage Notes: Store chicken and sauce separately, refrigerated up to 3 days or frozen up to 2 months. Reheat chicken in an oven or air fryer before combining with reheated sauce.
Nutrition Disclaimer: Calorie and nutrition estimates are approximate and will vary based on specific ingredients, portion sizes, and oil absorption during frying.
Conclusion
Crispy Chinese Lemon Chicken earns its spot as a takeout favorite for good reason: crunchy fried chicken, a bright and glossy lemon sauce, and a balance of sweet and tangy that works for nearly every palate. The version most people make at home falls short not because the ingredients are hard to find, but because a few key details, the double fry, fresh lemon and zest, sauce added at the last moment, get skipped along the way. Handle those details correctly and Crispy Chinese Lemon Chicken made in your own kitchen will hold up against, and likely beat, whatever shows up in a takeout container. Give it a try for your next dinner and taste the difference for yourself.