Coq au Vin Recipe: The Classic French Chicken Stew Worth the Wait
Table of Contents
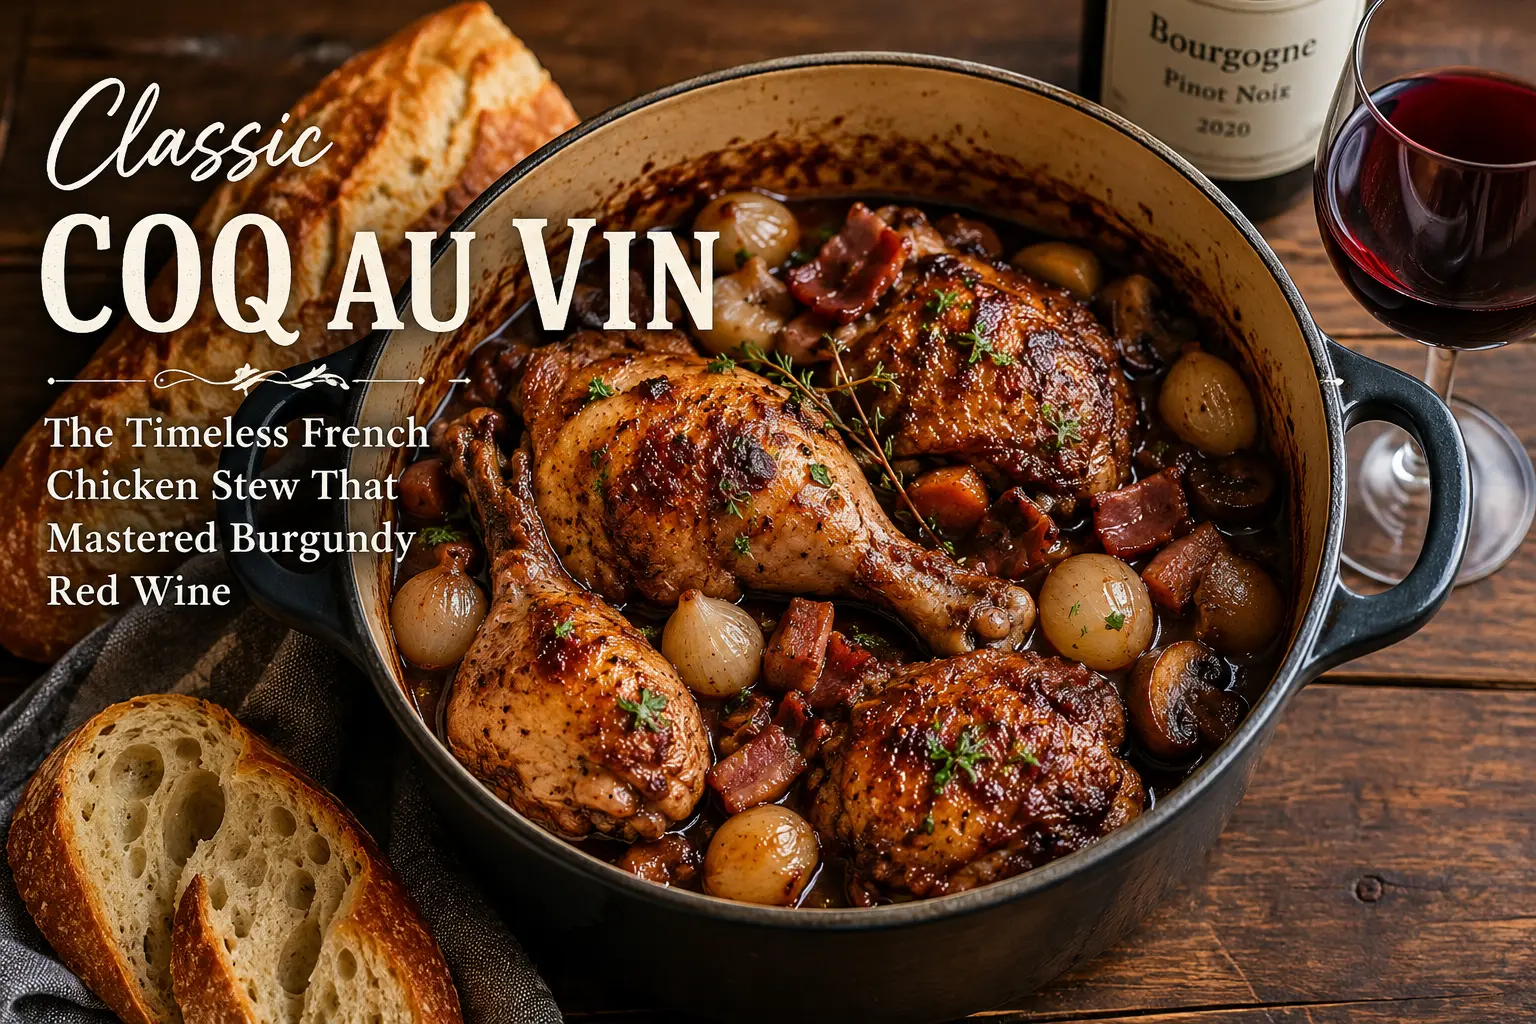
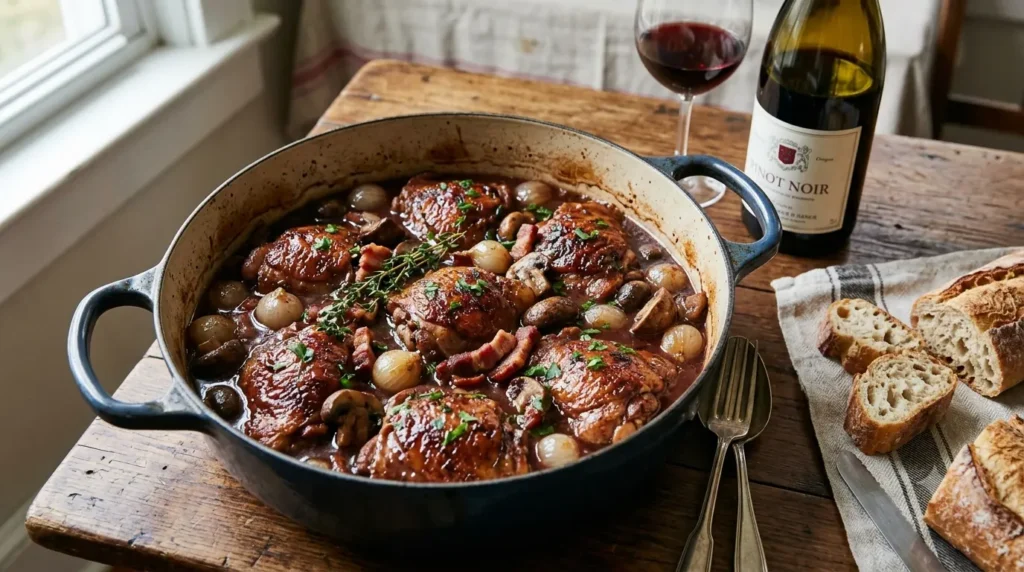
Coq au Vin is the classic French chicken stew built around one simple idea: braise chicken slowly in good red wine until the meat becomes tender and the sauce turns rich and deeply flavored.
Some dishes are trendy for a season. Coq au Vin has been on French tables for well over a century, and it hasn’t needed to change a thing. This is peasant cooking elevated by nothing more than time, good wine, and a handful of techniques that turn simple ingredients into something a Michelin kitchen would still proudly serve. If you’ve only ever had a rushed version, something braised for twenty minutes in a splash of red wine and called done, you haven’t actually had Coq au Vin. The real thing takes patience, but almost none of that patience is active work. Most of it is just letting a pot do what a pot does best.
This post is going to walk you through exactly why this dish works the way it does, from the science of what wine actually does to chicken over hours of slow cooking, to the specific reason its garnishes get cooked separately instead of dumped in all at once. Understand the logic here, and you’ll never make a flat, thin, disappointing version of this dish again.
What Coq au Vin Actually Is
The name translates plainly: rooster in wine. And that’s not a poetic flourish, it’s a literal description of the dish’s origins. Before industrial poultry farming made tender young chickens available year-round, French households cooked with what they had, and an old rooster, tough, muscular, full of connective tissue from a working life in the barnyard, was not a bird you could roast and expect to enjoy. That kind of meat needed hours of slow, moist cooking to break down its tough fibers into something tender, and it needed a bold, acidic braising liquid to stand up to its strong, gamey flavor. Red wine, something the region already had in abundance, was the obvious answer.
Burgundy specifically gets credit as the dish’s spiritual home, not by accident. The region produces some of France’s most respected Pinot Noir, and using the local wine in the local pot was simply how French regional cooking worked long before anyone thought to write the technique down as a formal recipe. Over time, as tender young chickens became the norm in most kitchens, the dish adapted. Modern Coq au Vin uses regular chicken rather than an actual aged rooster, but it keeps the technique that made the original version work: braising in wine, low and slow, until the meat is fall-apart tender and the sauce has taken on real depth.
Why Bone-In Thighs and Legs, Not Breasts
This is worth understanding before you shop for ingredients, because it changes the entire outcome of the dish. Chicken breast is lean, and lean meat does not do well over a long, slow braise, it dries out and turns stringy long before the connective tissue in a tougher cut would even start to break down. Thighs and legs, by contrast, are dark meat, richer in fat and loaded with collagen, the connective protein that slowly converts into gelatin over hours of gentle, moist heat. That gelatin is what gives a proper braise its silky, body-rich sauce and its tender, almost spoon-soft meat. Bone-in cuts add even more to this equation, since the bone itself contributes flavor and body to the liquid as it simmers. If you want a Coq au Vin that actually tastes like the dish it’s named after, skip the boneless breast entirely.
The Wine Science: Why Burgundy, and Why It Matters
Let’s talk about what’s actually happening in the pot, because understanding this will change how you shop for the bottle.
Why a dry, tannic red Burgundy works. Pinot Noir, the grape behind red Burgundy, brings a specific combination of qualities that make it ideal for this dish. It’s dry, meaning there’s minimal residual sugar to caramelize into an overly sweet sauce during a long simmer. It carries real acidity, which cuts through the richness of the chicken fat, butter, and bacon fat that build up over the course of cooking, keeping the final dish balanced instead of heavy. And it has moderate tannins, the compounds responsible for that slightly gripping, drying sensation on your tongue, which give the finished sauce a bit of structure and backbone rather than tasting flat or one-dimensional. You don’t need an expensive bottle. You need a genuinely dry, medium-bodied Pinot Noir, ideally from Burgundy itself, though a solid Oregon or California Pinot Noir will get you most of the way there if a French bottle isn’t available.
What happens to the alcohol as it reduces. When wine simmers over an extended period, the alcohol doesn’t just vanish instantly, but it does steadily evaporate, since ethanol has a lower boiling point than water. Over the two to three hours this dish spends braising, the sharp, boozy edge that a young wine carries mellows out considerably, leaving behind the wine’s deeper qualities, its fruit character, its acidity, its structure, concentrated rather than diluted. This is also why you sear and deglaze before you braise. Reducing wine down partially before it goes into a long braise concentrates its flavor even further, so the sauce doesn’t taste watered down by the time the chicken is tender.
Why cheap “cooking wine” ruins the sauce. Bottled cooking wine, the kind sold in the vinegar aisle rather than the wine aisle, is loaded with added salt and preservatives, and it’s almost always made from low-quality, often oxidized wine that was never good enough to sell as drinking wine in the first place. Since this dish reduces its wine down over hours, concentrating everything in the bottle, whatever flaws exist in a cheap cooking wine get concentrated right along with it. A genuinely bad or salty bottle doesn’t get better under heat, it gets worse. The rule that professional kitchens actually follow is simple: cook with a bottle you’d be willing to pour into a glass and drink. You don’t need to spend thirty dollars, but you do need a real, dry, drinkable bottle.
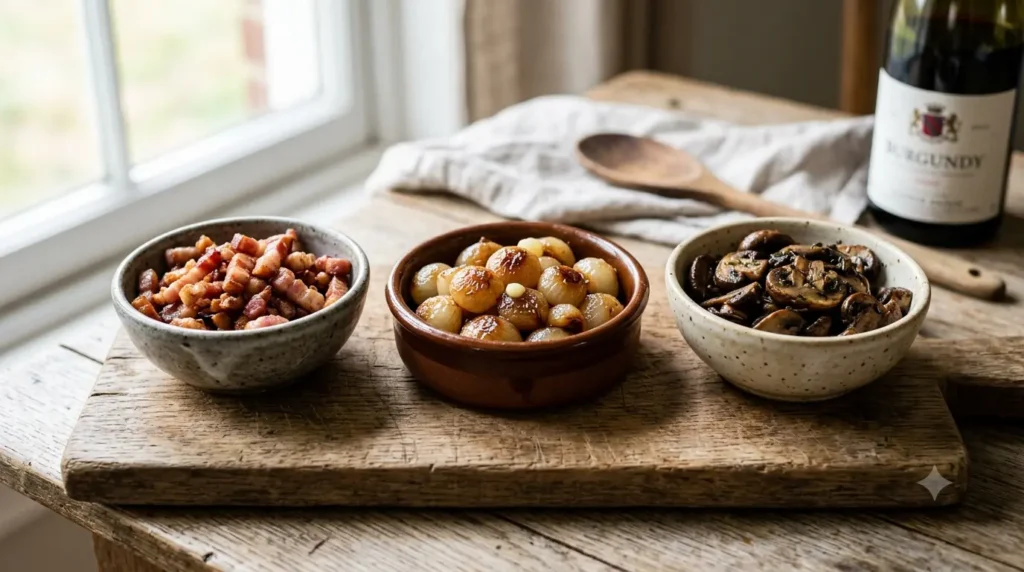
The Holy Trinity of Garnishes
A proper Coq au Vin isn’t just braised chicken in wine sauce. It’s finished with three specific garnishes, each cooked separately and added back near the end, and understanding why they’re handled this way is the difference between a muddy, one-note stew and a dish with real textural variety.
Lardons. These are small strips or batons of bacon, traditionally cut from pork belly or a similar cut, cooked until crisp and rendered of much of their fat. That rendered fat becomes the very first layer of flavor in the pot, since it’s what you’ll use to sear the chicken. The crisped lardons themselves get set aside and added back near the end of cooking, which preserves their texture, since simmering them in liquid for hours would turn that crispness soft and rubbery.
Pearl onions, glacé à brun. This French technique translates to “browned glaze,” and it describes a specific method: small pearl onions are peeled, then cooked in a bit of butter, sugar, and a splash of stock or water in a covered pan until the liquid reduces down to a glossy, caramelized glaze that coats the onions in a deep golden-brown sheen. This is done separately from the main braise because pearl onions cooked directly in a liquid for hours tend to fall apart and turn mushy, losing their shape entirely, whereas the glacé à brun method gives you a tender onion that still holds together, with a sweet, caramelized exterior that adds real dimension to the final plate.
Sautéed mushrooms. Mushrooms are almost always cooked in a separate pan, in hot butter, until they’re browned and any released liquid has evaporated. Cooking them this way, rather than simmering them raw in the braising liquid, allows them to actually brown through direct contact with hot fat, a chemical process called the Maillard reaction, which builds deep, savory, umami flavor that simply doesn’t happen in a wet braise. Mushrooms simmered directly in liquid from the start tend to turn gray, slippery, and bland by comparison.
All three components get folded back into the pot in the final stretch of cooking, just long enough to warm through and pick up a bit of the sauce, but not long enough to lose the texture each one worked to build.
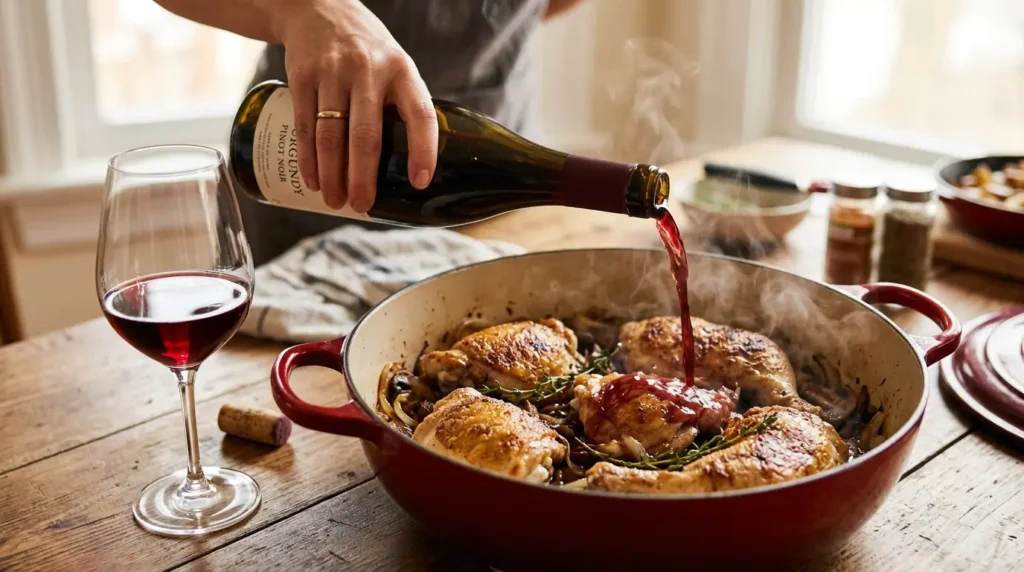
Step-by-Step Assembly and Technique
This is where the individual pieces come together into the finished dish. Take your time here, especially with the searing step, since it’s doing more flavor work than almost anything else in the recipe.
Searing the Chicken
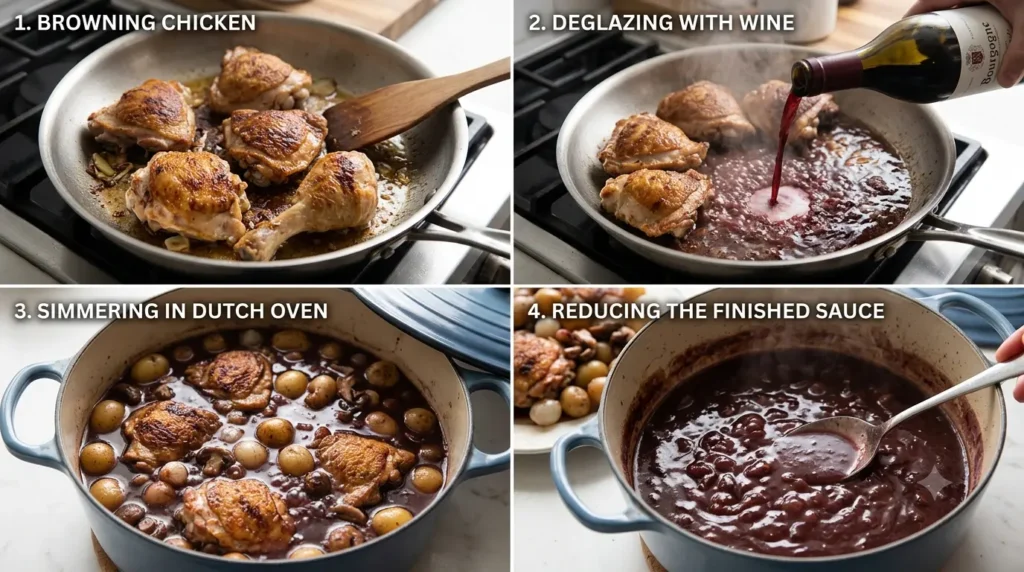
Pat your chicken pieces completely dry before they go anywhere near the pot, moisture on the surface will steam instead of sear, and you’ll lose out on the deep, browned crust you’re after. Working in the rendered lardon fat, sear the chicken skin side down first, in batches if necessary so you don’t crowd the pot, for about six to eight minutes per side, until deeply golden brown. Resist the urge to move the pieces around, undisturbed contact with hot fat is what builds that crust. Remove the chicken once it’s well browned on both sides. It won’t be cooked through yet, and that’s fine, it finishes in the braise.
Building the Base
In the same pot, with all that flavorful fond stuck to the bottom, add your aromatics, typically a diced onion, sliced carrots, and minced garlic, along with a bit of tomato paste, which adds a subtle savory depth and a touch of natural sweetness once it caramelizes slightly in the residual fat. Cook until softened, then sprinkle in flour to build a light roux directly in the pot, which will help thicken the braising liquid over the course of cooking. Cook the flour for a minute or two, just enough to lose its raw taste, stirring constantly so it doesn’t scorch.
Flambé, If You’re Using It
Some traditional recipes call for a flambé step, warming a small amount of brandy or cognac separately, then carefully igniting it and pouring it, still flaming, over the chicken before the wine goes in. This is a dramatic, restaurant-style technique that burns off the harshest alcohol notes very quickly while leaving behind a rich, slightly caramelized depth. It’s optional. If you’re not comfortable working with an open flame in your kitchen, skip it entirely, simply add the brandy directly to the pot and let it simmer for a minute before moving on to the wine. The dish will still taste excellent either way.
Deglazing and Braising
Pour in your red wine, scraping up all that browned fond from the bottom of the pot as it bubbles. Return the chicken to the pot, add enough chicken or beef stock to nearly cover the meat, along with a bouquet garni of fresh thyme, bay leaf, and parsley stems. Bring everything to a gentle simmer, then cover and either reduce the heat to very low on the stovetop or transfer the whole pot to a 325°F oven. Let it braise for two to two and a half hours, checking occasionally to make sure it’s holding a slow, lazy simmer rather than a hard boil, which would toughen the meat instead of tenderizing it. You’ll know it’s ready when the chicken is fall-apart tender and easily pulls from the bone with a fork.
Reducing the Sauce to Nappé
Once the chicken is tender, remove it from the pot along with the bouquet garni, and let the braising liquid simmer uncovered for ten to fifteen minutes to reduce and concentrate. You’re aiming for what French kitchens call nappé, a French culinary term describing a sauce reduced to the point where it coats the back of a spoon in a thin, even layer and holds a clean line when you drag a finger through it. If your sauce isn’t quite there yet, keep simmering. Once it reaches that consistency, stir in your reserved lardons, glazed pearl onions, and sautéed mushrooms, return the chicken to the pot, and let everything warm together for a few final minutes before serving.
Pro Tips and Troubleshooting
My sauce came out too thin. This almost always means it didn’t reduce long enough after the chicken came out. Give it more time simmering uncovered, that’s usually all it needs. If you’re short on time, a small slurry of a teaspoon of cornstarch whisked into a tablespoon of cold water, stirred into the simmering sauce, will thicken it within a couple of minutes without dulling the flavor.
My sauce tastes too sharp or acidic. A young, particularly tannic wine can sometimes push the sauce toward sharpness, especially if it hasn’t had enough time to mellow during the braise. The fix is a touch of fat and a touch of sweetness working together, whisk in a small pat of cold butter off the heat, which rounds out sharp edges (a classic French technique called monter au beurre), and if it’s still noticeably acidic, a small pinch of sugar can balance it further. Add both gradually and taste as you go, it’s much easier to add more than to pull it back out.
My sauce broke or looks greasy on top. This typically happens if the braise ran at too aggressive a simmer, agitating the fat and liquid too hard for too long. Skim the excess fat off the surface with a spoon or a fat separator, then whisk the sauce vigorously to help pull it back together. Going forward, keep your braise at a gentle, barely-there simmer rather than a rolling one.
Can I make this a day ahead? Not only can you, you genuinely should if your schedule allows it. Braised dishes like this one are well known for tasting even better the next day, since the flavors have had time to fully meld and the sauce has had a chance to relax and deepen overnight in the refrigerator. Cook the dish through completely, including folding in the garnishes, then cool and refrigerate. The next day, reheat it gently on the stovetop over low heat until warmed through, and don’t be surprised if it tastes noticeably richer and more cohesive than it did the night before.
My chicken seized up and turned tough halfway through. This is usually a sign the braise is running too hot. A hard boil, rather than a gentle simmer, causes the proteins in the meat to contract too quickly, squeezing out moisture before the collagen has had time to properly break down into gelatin. Lower your heat and give it the full time it needs, low and slow is not a suggestion here, it’s the entire mechanism that makes this dish work.
Pairings: What to Serve Alongside
Buttered egg noodles are the classic pairing in many French households, their slightly chewy texture and the way they soak up sauce make them a natural match for this dish.
Mashed potatoes, ideally something with a bit of texture rather than perfectly silky, give you a sturdy base that stands up to the richness of the sauce without disappearing under it.
A crusty baguette belongs on the table regardless of what else you’re serving, if only because you’ll want something to run through the last of the sauce once the plate is otherwise empty.
Red wine, and specifically, the same bottle or the same style of wine you cooked with, is the natural choice at the table. A red Burgundy Pinot Noir is the traditional pour, though a lighter-bodied Beaujolais or a similarly structured Pinot Noir from Oregon also complements the dish well without overwhelming it.
A simple green vegetable on the side, sautéed green beans or roasted asparagus, adds a fresh, slightly bitter contrast that keeps the whole meal from tipping too far into richness.
The Recipe Card
Classic Coq au Vin Bone-in chicken braised low and slow in red Burgundy wine, finished with crisp lardons, glazed pearl onions, and sautéed mushrooms.
Prep Time: 30 minutes Cook Time: 2 hours 45 minutes Total Time: approximately 3 hours 15 minutes Yield: 4 to 6 servings
Ingredients
For the braise:
- 6 to 8 bone-in, skin-on chicken thighs and drumsticks
- Salt and freshly ground black pepper
- 6 ounces lardons or thick-cut bacon, diced
- 1 medium yellow onion, diced
- 2 carrots, sliced
- 3 cloves garlic, minced
- 2 tablespoons tomato paste
- 3 tablespoons all-purpose flour
- 2 tablespoons brandy or cognac (optional)
- 1 bottle (750ml) dry red Burgundy or other quality Pinot Noir
- 2 cups chicken or beef stock
- 1 bouquet garni (fresh thyme, bay leaf, parsley stems, tied together)
For the garnishes:
- 1 tablespoon butter
- 1 teaspoon sugar
- 10 ounces pearl onions, peeled
- 2 tablespoons butter
- 12 ounces cremini mushrooms, halved or quartered
- Fresh parsley, chopped, for serving
Instructions
- Pat the chicken dry and season generously with salt and pepper.
- In a large Dutch oven over medium heat, cook the lardons until crisp and the fat has rendered. Remove with a slotted spoon and set aside, leaving the fat in the pot.
- Working in batches, sear the chicken skin side down in the rendered fat for 6 to 8 minutes per side, until deeply golden. Remove and set aside.
- Add the onion and carrots to the pot and cook for 5 minutes, until softened. Add the garlic and tomato paste and cook for 1 minute. Sprinkle in the flour and stir, cooking for 1 to 2 minutes.
- If using, add the brandy and let it simmer for a minute. Pour in the wine, scraping the bottom of the pot to lift the browned fond.
- Return the chicken to the pot, add the stock and bouquet garni, and bring to a gentle simmer. Cover and cook on low on the stovetop, or transfer to a 325°F oven, for 2 to 2 1/2 hours, until the chicken is fall-apart tender.
- Meanwhile, prepare the pearl onions: melt the butter and sugar in a small pan with the pearl onions and a splash of water, cover, and cook over medium-low heat for 15 to 20 minutes, until the onions are tender and glazed. Set aside.
- In a separate pan, melt the butter over medium-high heat and sauté the mushrooms until browned and any released liquid has evaporated, about 8 minutes. Set aside.
- Once the chicken is tender, remove it and the bouquet garni from the pot. Simmer the sauce uncovered for 10 to 15 minutes, until it coats the back of a spoon (nappé).
- Stir the reserved lardons, glazed pearl onions, and mushrooms into the sauce. Return the chicken to the pot and warm everything through for a few minutes.
- Taste and adjust seasoning, adding a pat of cold butter to smooth the sauce if needed. Serve hot, garnished with fresh parsley.
Notes: This dish tastes noticeably better made a day ahead. Cook completely, cool, and refrigerate, then reheat gently over low heat before serving.